
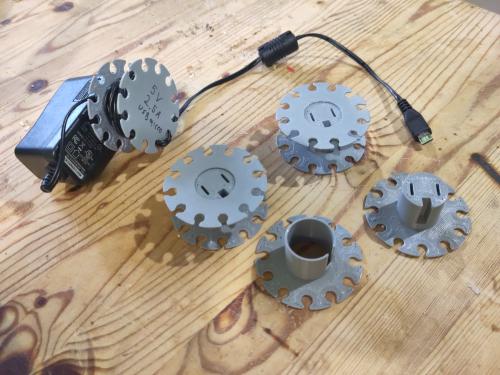
Whether it’s under my desk or in a storage box, a tangled mass of wall-wart cables always get my blood boiling. So in the interest of deferring my stress-related demise, today I came up with a solution.
I needed a way to organize bikes in a garage or shed when they weren’t being ridden. This is not for winter storage, so I wanted the bikes to remain accessible - just tidier. I also wanted my solution to be adjustable for wheels of different widths, and easy to flip out of the way when they’re not being used.
What I ended up with was simple, cheap (less than $4 per bike!) and extremely easy to build. I didn’t end up using any 3D printed parts, but this feels 3D-adjacent, so I’m including it here anyway.
◇◆◇◆◇◆◇◆◇◆◇◆◇◆◇◆◇◆◇
Let’s start by addressing the obvious answer: kickstands. You might think that’s exactly what they’re for, and they work just fine - for a single bike. But not when you’re trying to park several bikes side by side. In the process of leaning onto the kickstand, the bikes also lean into each other, which encourages handlebars and cables to tangle. The kickstands themselves get snarled on the pedals of adjacent bikes - especially if you want access to the bike in the middle - and have you ever tried tried to flip the kickstand up on a bike in the middle of the pack? Not again, thank you.
So that brings us to some kind of parking rack. I looked at a bunch of commercial and DIY solutions, but nothing hit the trifecta of being adjustable, inexpensive, and easy to move out of the way when not in use.
After a bit of brainstorming, I came up with a solution that hits all three. If you buy the parts retail, the whole thing will cost you about $5 Canadian, but if you’re the kind of person who finds this solution worthwhile, you probably already have what you need, so the price drops to free. Once you’ve got the parts, assembly and installation should only take about 10 minutes.
I call it the FlipStand.
There are several different ways to mount these, so read the entire page and decide which method is best for you before starting.
Guide Rails
For each FlipStand, you’ll need 2 pieces of 1x2" wood (which actually measures ¾" x 1½") with a 45° miter cut at one end.

Drill a hole about 1 inch from each end. The diameter of the hole should be slightly larger than the diameter of your chosen hinge. (Either carriage bolts or the threaded rod.) I used 5/16ths" bolts but use whatever you’ve got.
If You’re Using Bolt Hinges
Required Parts For Each FlipStand:
-
2 x 5" carriage bolts
-
2 guide rails
-
8 nuts and 8 washers that fit your bolts
Most timber frame construction has studs positioned every 16 inches, which is just about perfect spacing for bikes, so if you’ve got exposed studs, they make an ideal foundation for your FlipStand(s).
Drill a hole in the stud about 21" from the floor, the same diameter as the ones you drilled in the guide rails. (Place a guide rail into position and use that as a guide. You want the stud hole lined up with the one at the top end of the rail.)
Assemble the guide rails together at the bottom end using a carriage bolt, washers and nuts, as shown in the diagram. Then thread the second bolt through the top end of the guide rails and the stud, being sure to add the washers and nuts in the correct sequence.

The spacing washers (purple) keep the nuts from digging into the wood and ensure that the stand can flip up and down when you need it to.
The outer nuts (green rectangles at top and bottom) allow you to adjust for the width of your bike tire. The rails should be about ¼" father apart than the tire is wide. You want a bit of wiggle room when rolling the bike into position, but not so much that your bikes can lean. Racing bikes need about a 1" gap, while mountain bikes are more like 2".
The inner nuts (red rectangles at the top) allow you to adjust the position of the rack, left and right, if your bikes are too close together or too far apart.
If You Don’t Have Exposed Studs
To mount your FlipStands in a finished room that has no exposed studs, you can create your own t-blocks (like the ones shown in the diagram below). Ideally, these would be mounted on the wall in line with the hidden studs, but these are not load bearing, so they might work just mounted to the wall with drywall anchors. Use your best judgement here, since I haven’t tested this scenario. Once those are mounted, you can just follow the instructions above, using the t-blocks instead of studs.
If You’re Using a Rod Hinge
Rather than an individual carriage bolt and mount per FlipStand, you could use a single threaded rod as a common hinge instead. This also works if your studs don’t match up with the spacing and positions you want for your bikes. The rod should be long enough to span across your bike parking zone, and should match the thread of your washers and nuts.
You’ll need to create a at least two mounting brackets, which ideally should be affixed to studs for strength. These can be made from a t-shaped block of wood, as shown in the diagram, or even a few pieces of angle bracket. But whichever type you use, they’ll each need a hole wide enough to pass the rod through. As mentioned, they won’t be bearing any weight, so they don’t have to be particularly robust, and you only need one bracket at each end. (You can add a third one in the middle if you like, but be sure to thread half of your washers nuts and rails onto the rod on either side of the middle bracket.)
Required Parts For Each FlipStand:
-
1 x 5" carriage bolt
-
2 guide rails
-
7 nuts and 7 washers

Start by connecting your guide rails in pairs by threading them with nuts and washers onto a carriage bolt. Adjust the nuts to get the spacing right for your bike. The rail gap should be about ¼" wider than you tire.
Once the rails are ready, you can push your rod through the hole in the first bracket, then add nuts, washers, and guide rails as indicated in the diagram, before running the rod through the last bracket.

And lastly, as promised, here’s what the rack looks like when you’re not using it. Completely out of the way, leaving the space free for other purposes.
