
Quick to print, quick to deploy, and quick to remove, they’ll bind your cables and cords so tight that you’ll want to use them everywhere.
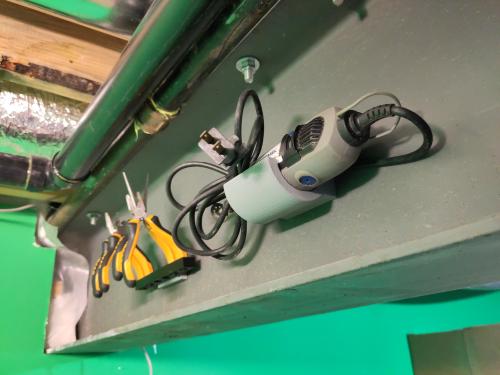
Whether it’s under my desk or in a storage box, a tangled mass of wall-wart cables always get my blood boiling. So in the interest of delaying my stress-related demise, today I came up with a solution.
◇◆◇◆◇◆◇◆◇◆◇◆◇◆◇◆◇◆◇
This is really three problems tangled together:
-
if I don’t store them with tidy cables, my box of wall-warts becomes an interwoven mess
-
if I do store them with tidy cables, that invariably covers the power rating, so finding the one I need in the box is a pain
-
when deploying the wart, I rarely need the entire cord length, so the underside of my desk becomes a tangled monstrosity
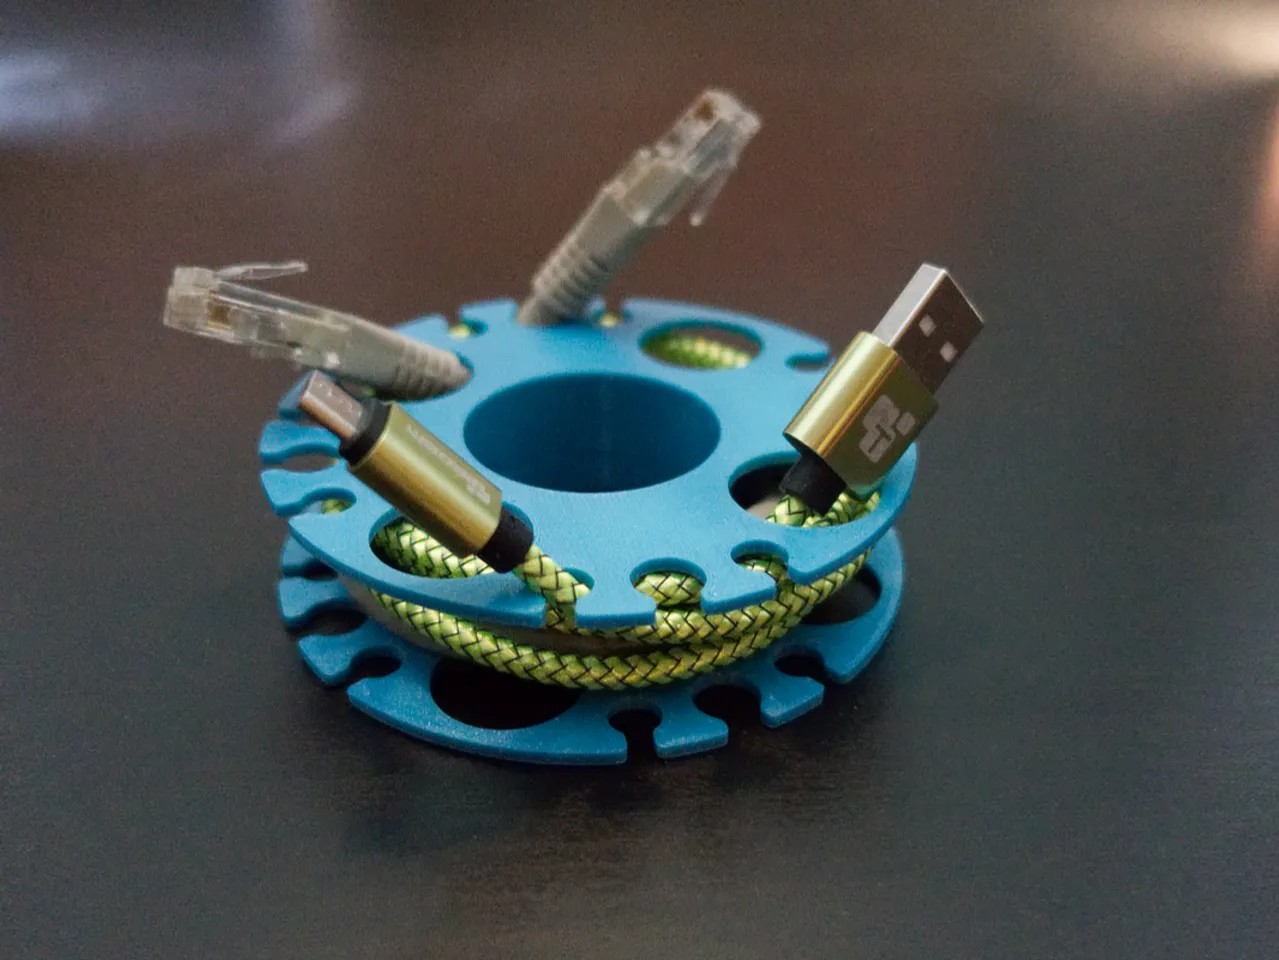 Well yesterday I found this solution, by Kimframes, that was almost perfect. It provides an easy way to store a cable and to unwind only as much as I need when using it. But it wasn’t quite right for my needs. What I wanted to add was:
-
a parametric design so I could customize the sizes of the spool, the rim walls, and the teeth
-
a way to affix it to its wall-wart while in storage
-
a way to keep it affixed to its wall-wart when in use
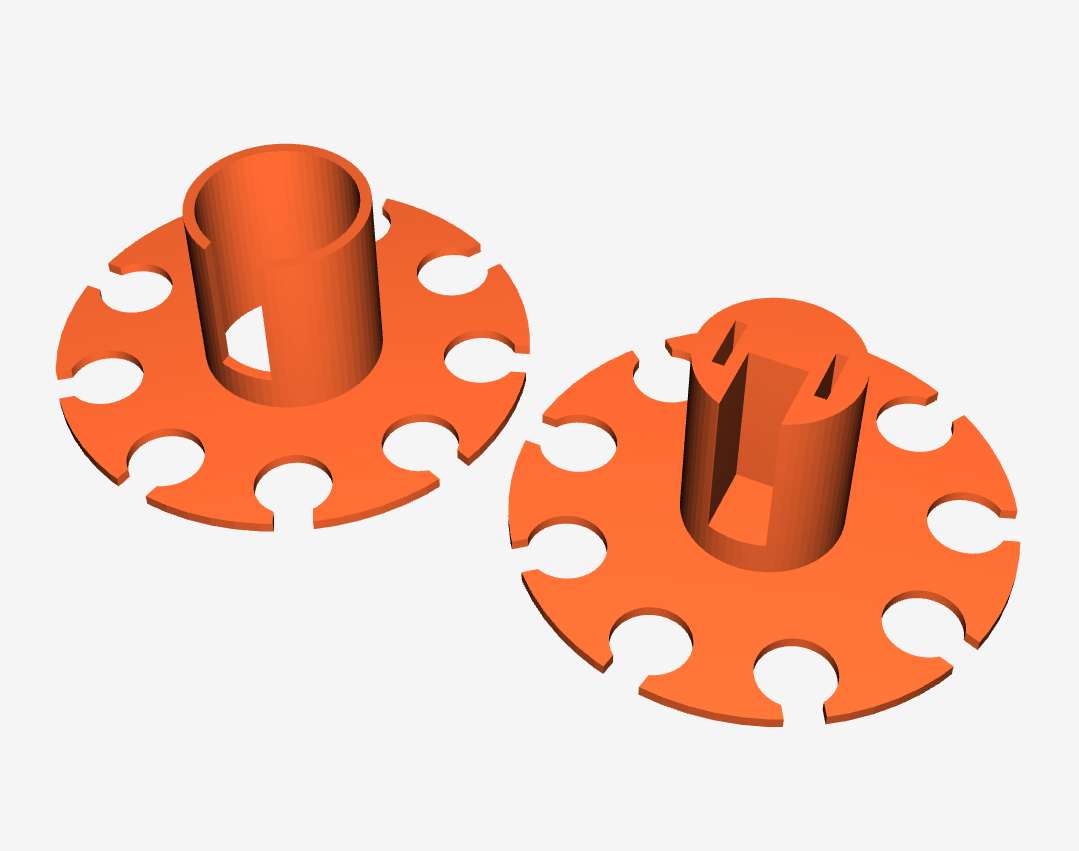
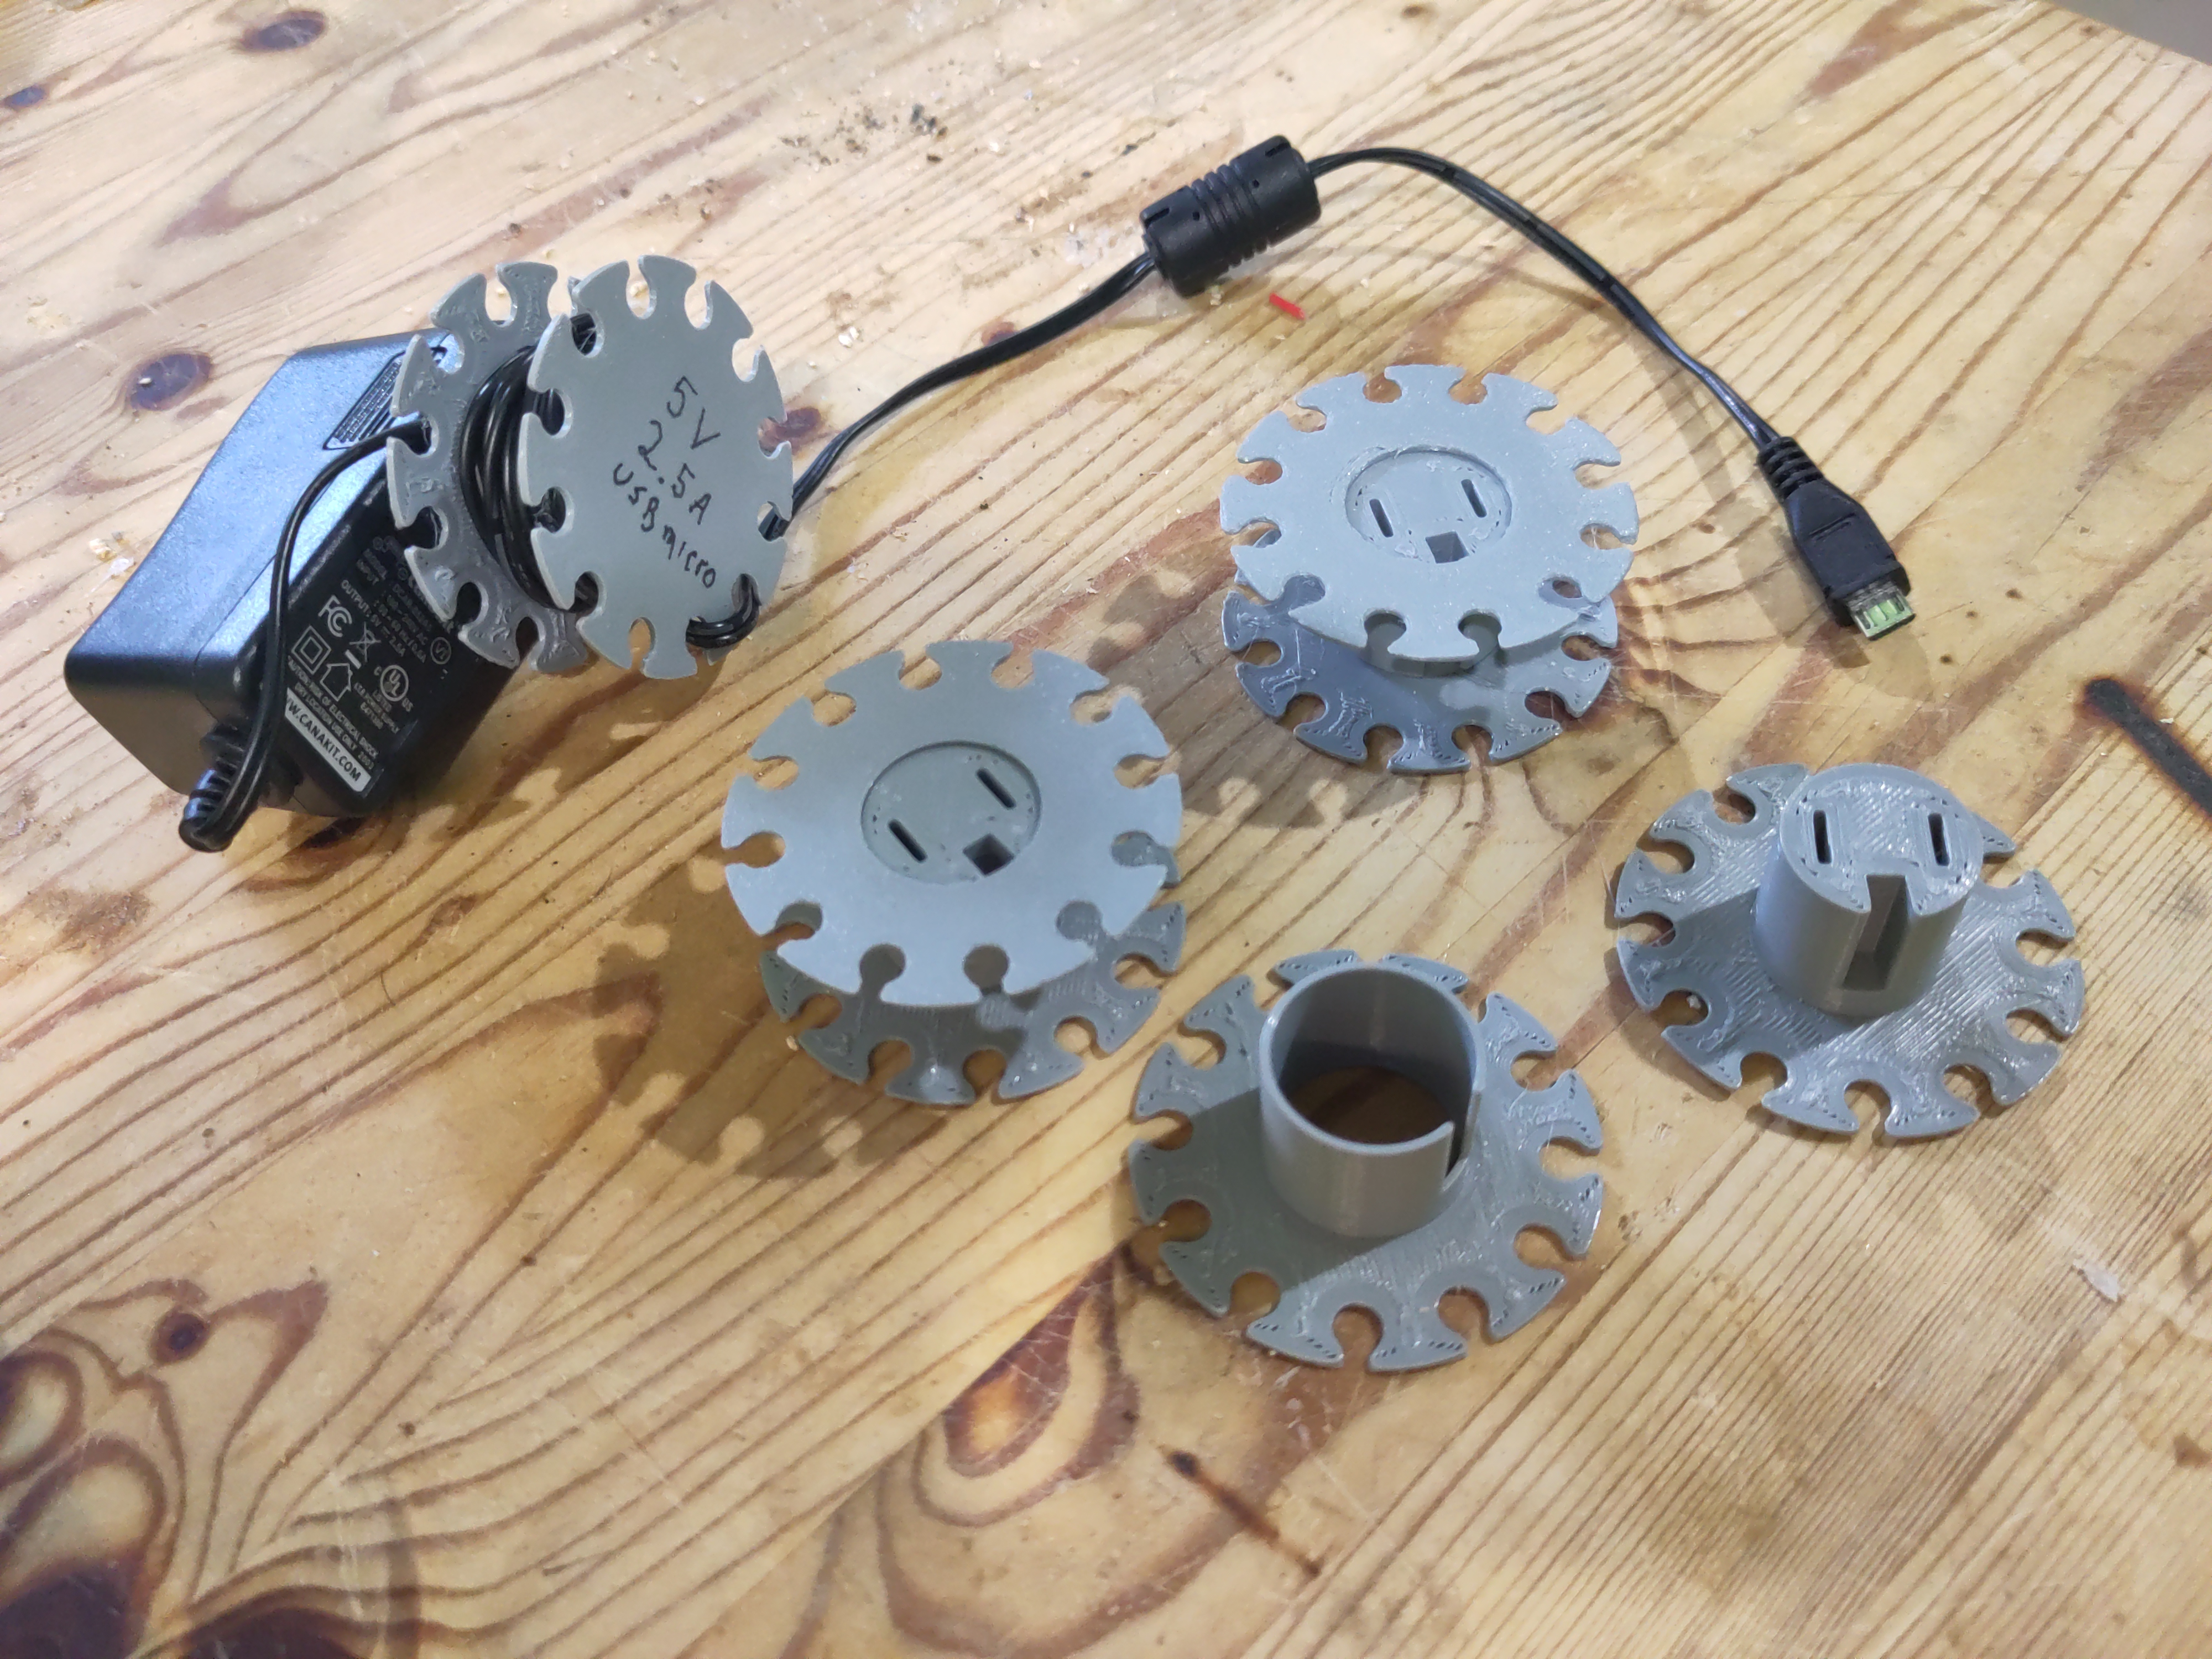
Here’s what I came up with. By filling in one spool core and giving it prong slots, I can now plug the wall-wart into the spool to keep everything tidy in the box.
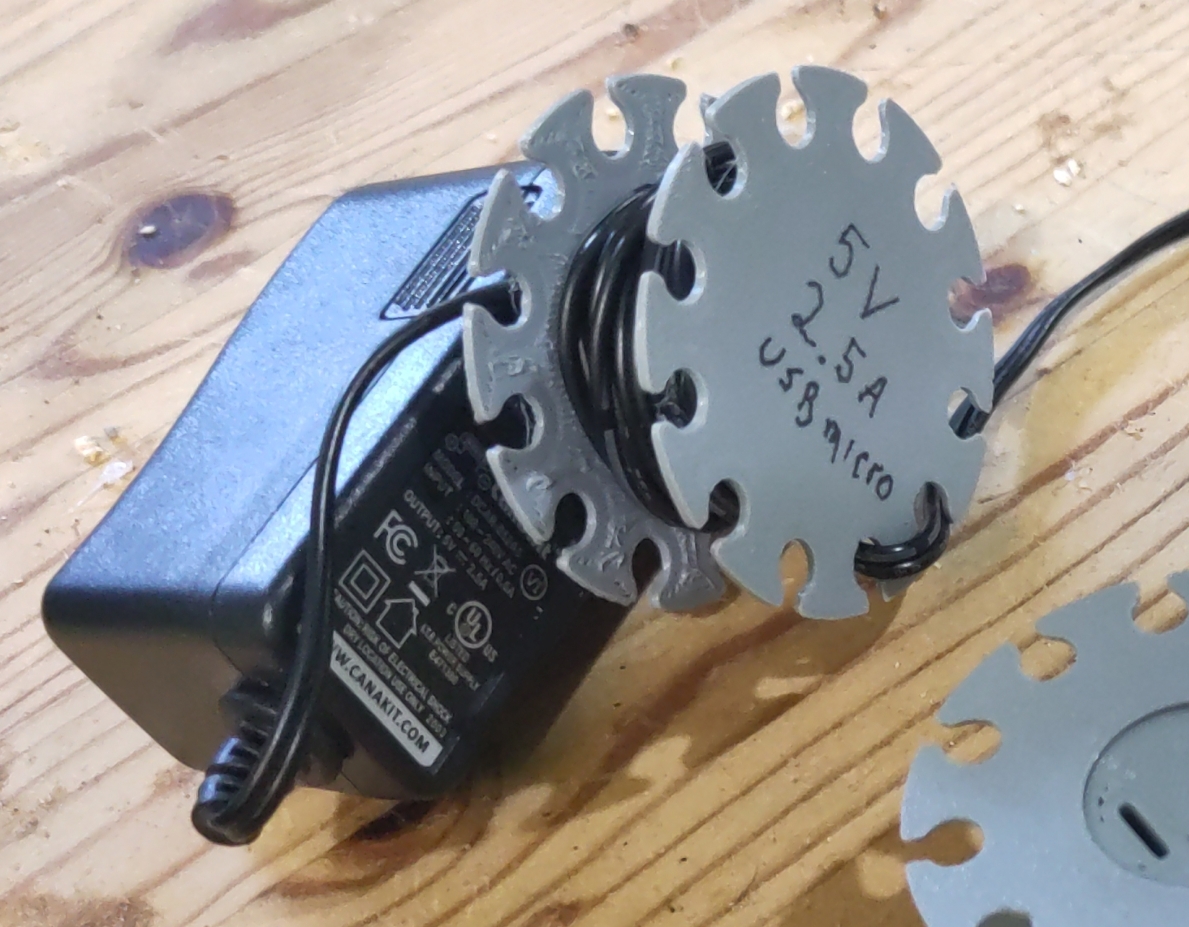
Doing so also leaves a big flat face exposed, which is the perfect place to add the power details with a Sharpie. Now pawing through a box to find the one I want is trivial.
My version, implemented in OpenSCAD, makes all the parameters easy to adjust so I can accommodate different cable diameters and lengths, and change the number of teeth.
I’ve only had these for 24 hours now, but I’ve already printed and deployed about 10 of them.